Local 테스트용 Elasticsearch Docker로 설치
Elasticsearch 설치
https://www.elastic.co/guide/en/elasticsearch/reference/current/run-elasticsearch-locally.html
https://www.elastic.co/guide/en/elasticsearch/reference/current/docker.html
$ docker network create elastic

$ docker pull docker.elastic.co/elasticsearch/elasticsearch:8.7.1

$ docker run --name elasticsearch --net elastic -p 9200:9200 -p 9300:9300 -e "discovery.type=single-node" -t docker.elastic.co/elasticsearch/elasticsearch:8.7.1
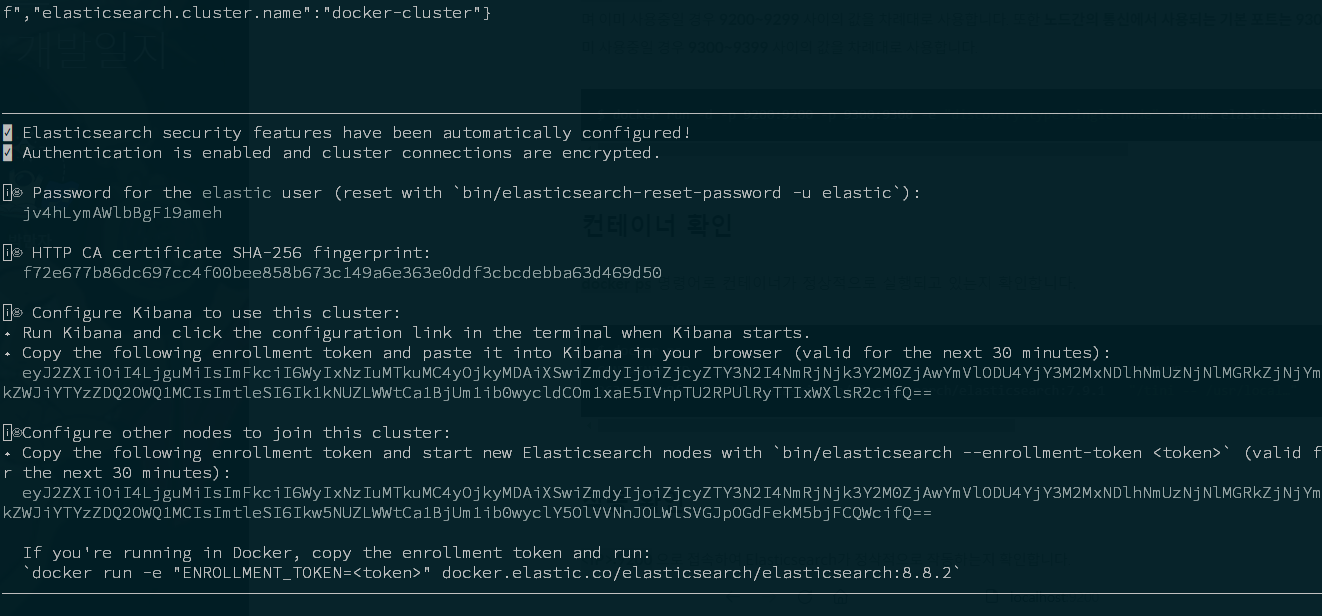
Elasticsearch를 처음 시작될 때 생성된 elastic사용자 비밀번호와 Kibana 등록 토큰이 표시되는데 이 값은 메모장에 저장해 둔다.
비밀번호 변경
docker exec -it elasticsearch /usr/share/elasticsearch/bin/elasticsearch-reset-password -u elastic
Password for the [elastic] user successfully reset.
New value: qL+ID96+c+G_LyEizwMJ
인증서파일 복사
docker cp elasticsearch:/usr/share/elasticsearch/config/certs/http_ca.crt .
연결 확인
curl --cacert http_ca.crt -u elastic:"T2etLuQK*pnvWk+w2IVQ" https://localhost:9200

{
  "name" : "f9ab7cf1da39",
  "cluster_name" : "docker-cluster",
  "cluster_uuid" : "H4JnjWpWSdydIjX8M7dg0g",
  "version" : {
    "number" : "8.7.1",
    "build_flavor" : "default",
    "build_type" : "docker",
    "build_hash" : "f229ed3f893a515d590d0f39b05f68913e2d9b53",
    "build_date" : "2023-04-27T04:33:42.127815583Z",
    "build_snapshot" : false,
    "lucene_version" : "9.5.0",
    "minimum_wire_compatibility_version" : "7.17.0",
    "minimum_index_compatibility_version" : "7.0.0"
  },
  "tagline" : "You Know, for Search"
}
analysis-nori plugin 설치
$ docker exec -it elasticsearch /usr/share/elasticsearch/bin/elasticsearch-plugin install analysis-nori
-> Installing analysis-nori
-> Downloading analysis-nori from elastic
[=================================================] 100%??
-> Installed analysis-nori
-> Please restart Elasticsearch to activate any plugins installed
Kibana 설치
$ docker pull docker.elastic.co/kibana/kibana:8.7.1

$ docker run --name kibana --net elastic -p 5601:5601 docker.elastic.co/kibana/kibana:8.7.1
...
[2023-07-06T04:34:51.697+00:00][INFO ][root] Holding setup until preboot stage is completed.

i Kibana has not been configured.

Go to http://0.0.0.0:5601/?code=042724 to get started.
브라우저를 열고 http://localhost:5601/?code=042724로 접속한다.
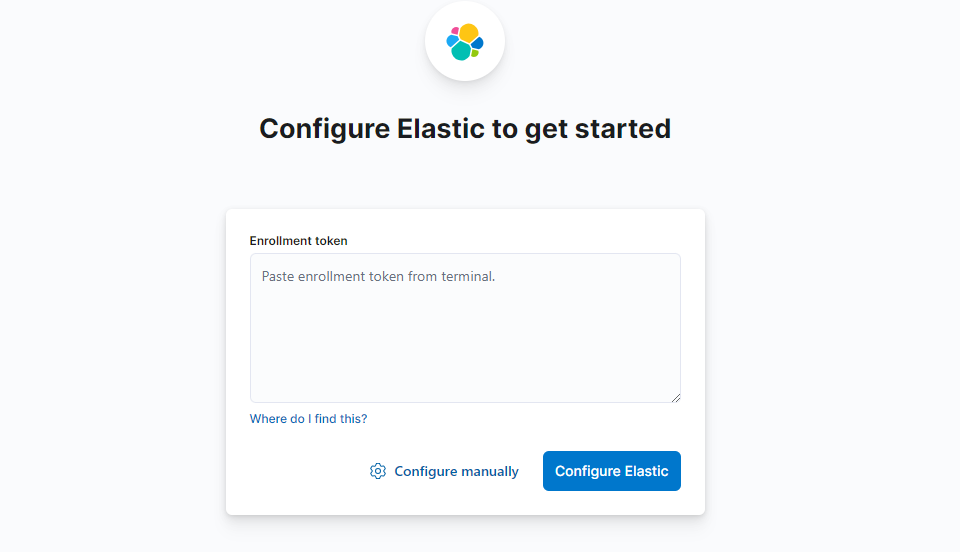
페이지가 열리면 토큰을 입력하고 나오는데 elasticsearch 설치 후 나온 인증 정보에서 kibana 토큰 값을 복사하여 붙여 넣는다.
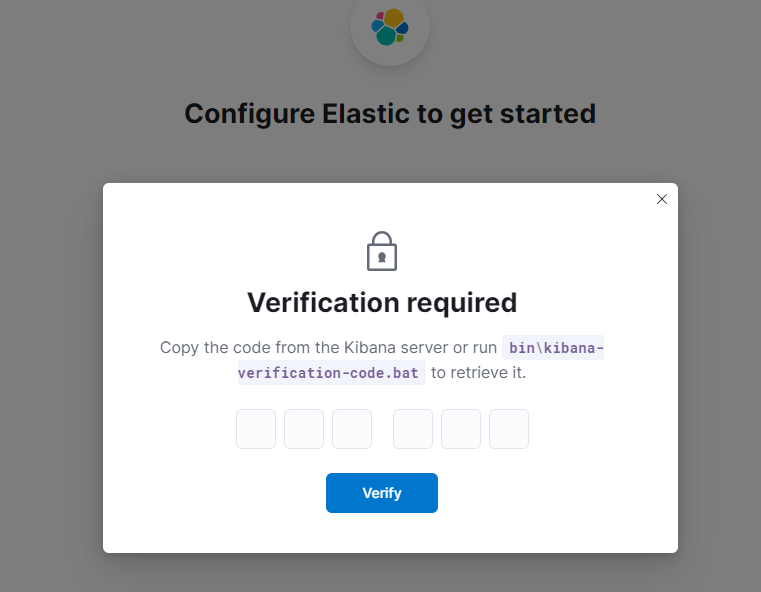
bin\kibana-verification-code.bat을 실행하여 코드를 입력하고 나온다.
$ docker exec -it kibana /usr/share/kibana/bin/kibana-verification-code
Your verification code is:  017 657
Verify 버튼을 누렀는데 오류가 발생함.
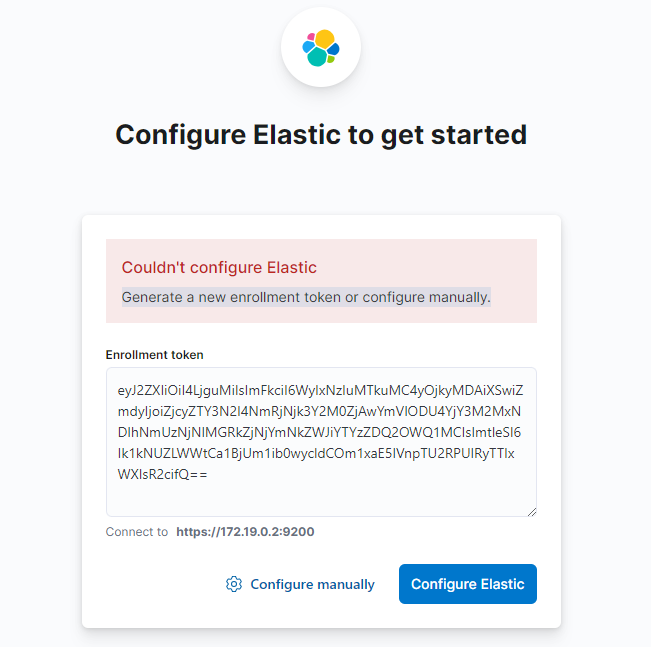
토큰을 다시 생성하라고 한다..
 docker exec -it elasticsearch /usr/share/elasticsearch/bin/elasticsearch-create-enrollment-token -s kibana       [13:43:48]
eyJ2ZXIiOiI4LjguMiIsImFkciI6WyIxNzIuMTkuMC4yOjkyMDAiXSwiZmdyIjoiZjcyZTY3N2I4NmRjNjk3Y2M0ZjAwYmVlODU4YjY3M2MxNDlhNmUzNjNlMGRkZjNjYmNkZWJiYTYzZDQ2OWQ1MCIsImtleSI6IjJ6NkZLWWtCdFVUU3JtenMyQ1lKOmEwRFpLQkdjVDBTalR3UjFrZXBmNWcifQ==
토큰을 다시 붙여넣고 Configure Elastic 버튼을 누른다.
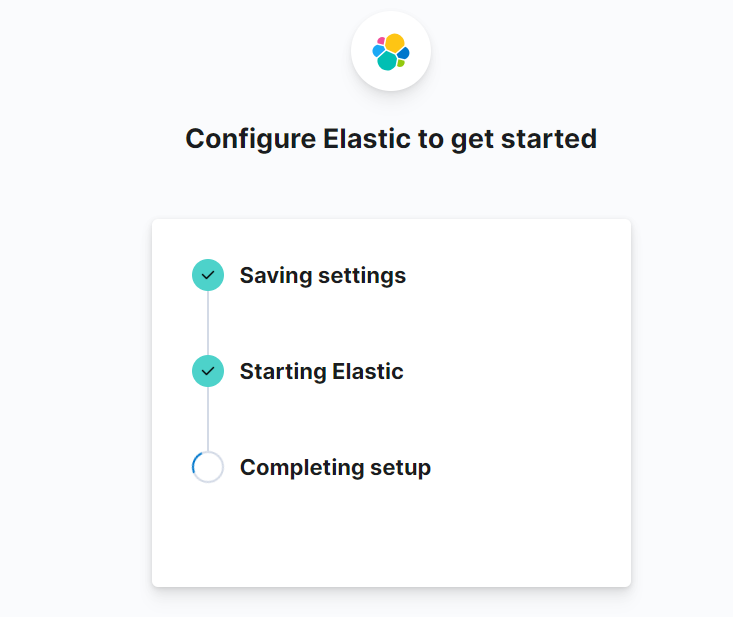
설정이 완료되고 로그인 창이 나온다.
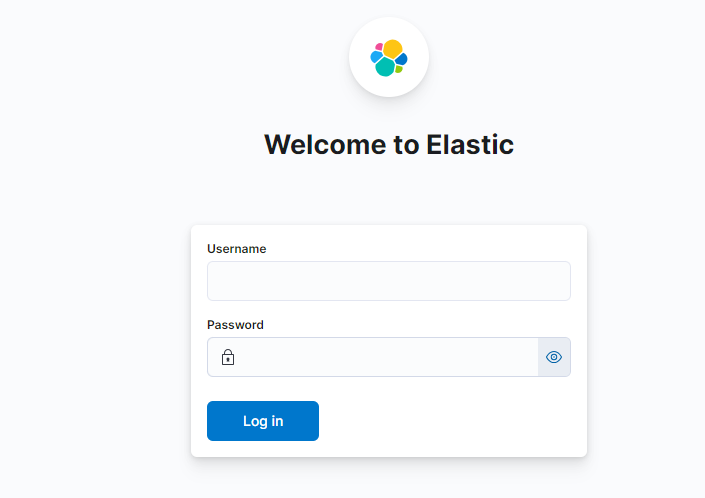
Username: elastic
Password는 elasticsearch 설치 후 나온 인증 값 중 패스워드인 T2etLuQK*pnvWk+w2IVQ 값을 넣고 로그인한다.

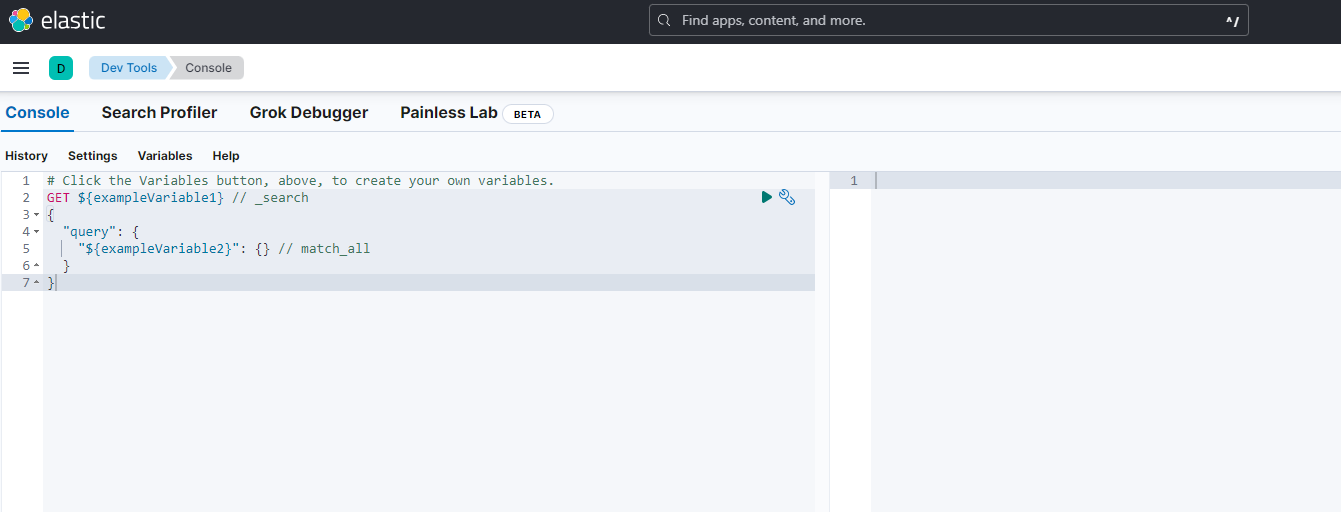
테스트
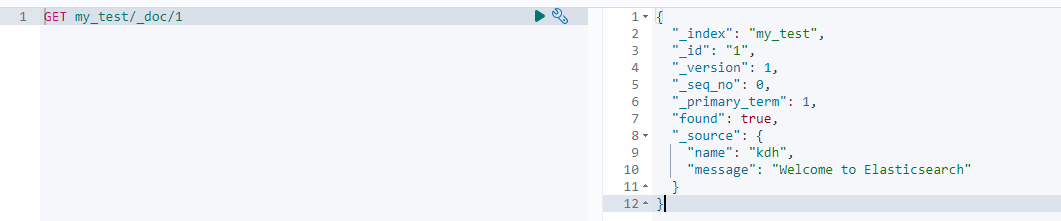
Kibana 좌측 메뉴에서 Dev Tools를 클릭한다.
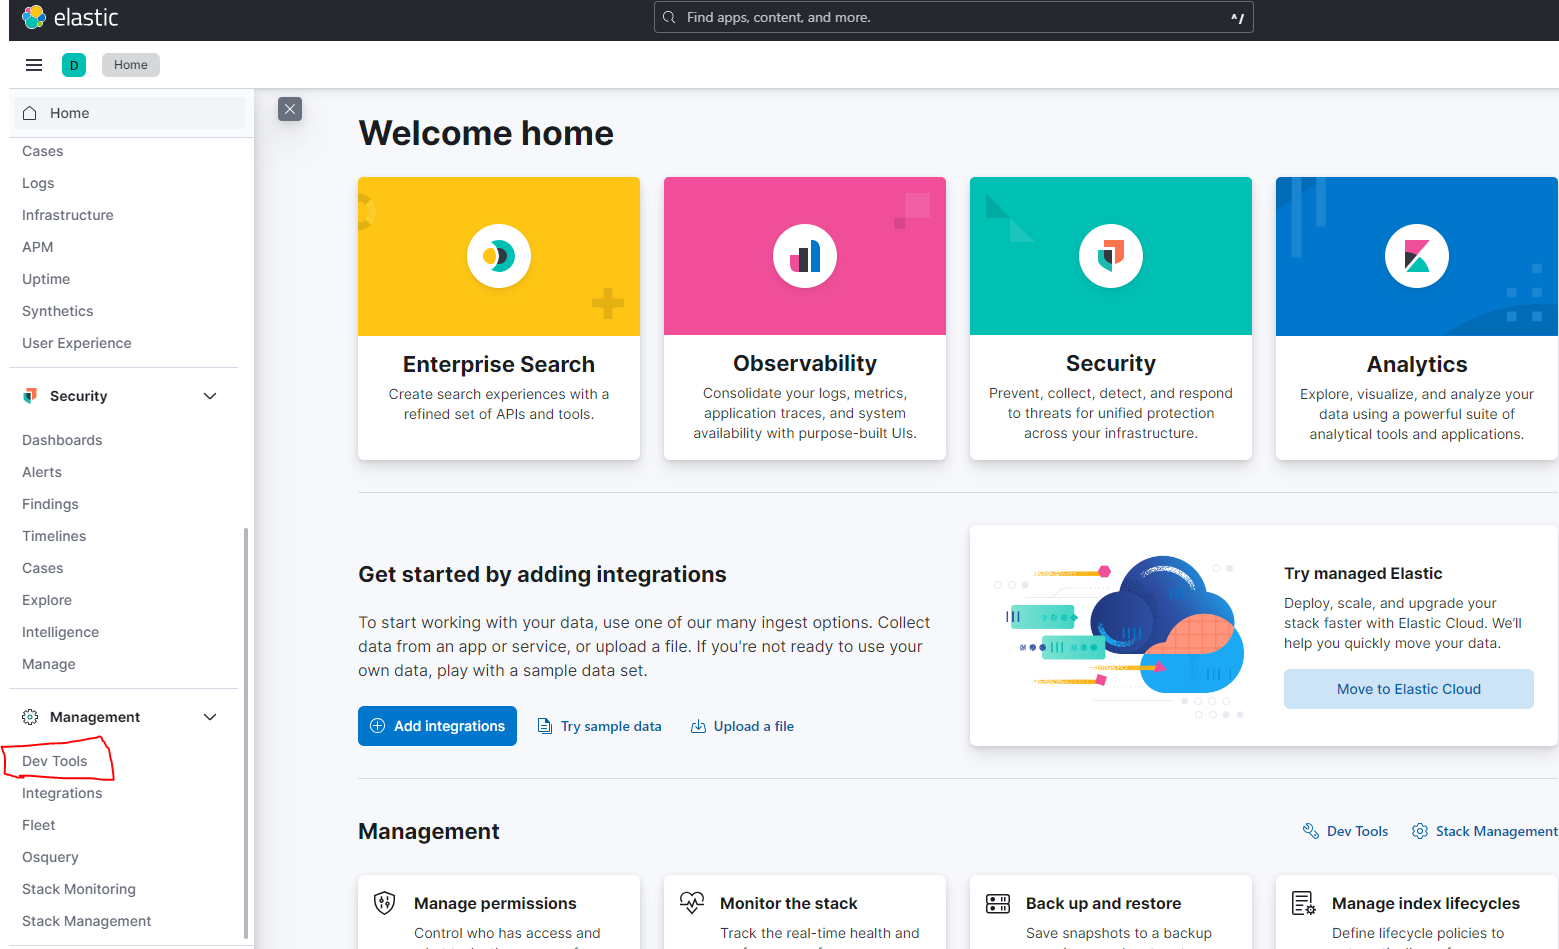
그러면 elasticsearch를 테스트 해볼 수 있는 화면이 나오는데 여기서 간단한 테스트들을 진행하면 된다.
보안 해제 하기
elasticsearch 8.x 버전은 기본적으로 security가 활성화 되어 있어서 client에서 접속할 때 보안부분을 신경 써야 하는데
local에서 테스트할 때 불편한 부분이 있다. 이 설정을 해제하려면 elasticsearch.yml을 수정하면 된다.
root 권한으로 docker container에 접속하기
# docker exec -itu0 elasticsearch /bin/bash

# apt-get install vim

# vim /usr/share/elasticsearch/config/elasticsearch.yml
xpack.security.enabled: false

xpack.security.enrollment.enabled: false

# Enable encryption for HTTP API client connections, such as Kibana, Logstash, and Agents
xpack.security.http.ssl:
  enabled: false
  keystore.path: certs/http.p12

# Enable encryption and mutual authentication between cluster nodes
xpack.security.transport.ssl:
  enabled: false
  verification_mode: certificate
  keystore.path: certs/transport.p12
  truststore.path: certs/transport.p12
#----------------------- END SECURITY AUTO CONFIGURATION -------------------------
elasticsearch를 재시작한다.
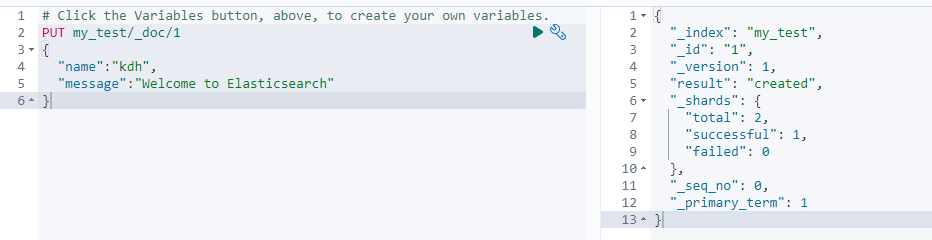
테스트
curl -X GET "http://localhost:9200"
{
  "name" : "f9ab7cf1da39",
  "cluster_name" : "docker-cluster",
  "cluster_uuid" : "H4JnjWpWSdydIjX8M7dg0g",
  "version" : {
    "number" : "8.7.1",
    "build_flavor" : "default",
    "build_type" : "docker",
    "build_hash" : "f229ed3f893a515d590d0f39b05f68913e2d9b53",
    "build_date" : "2023-04-27T04:33:42.127815583Z",
    "build_snapshot" : false,
    "lucene_version" : "9.5.0",
    "minimum_wire_compatibility_version" : "7.17.0",
    "minimum_index_compatibility_version" : "7.0.0"
  },
  "tagline" : "You Know, for Search"
}
elasticsearch의 보안 설정을 false하면 kibana도 다시 install해야 한다.
kibana 컨테이너 삭제 후 다시 시작
docker run --name kibana --net elastic -p 5601:5601 docker.elastic.co/kibana/kibana:8.7.1
댓글남기기