Rocky Linux Vue Web Server 설정
웹 서버 기본 설정하기
에디터 설치
# yum install vim
또는
# yum install nano
Host Name 설정
# hostnamectl set-hostname web-server
# hostname
web-server

# vim /etc/hosts
127.0.0.1   localhost localhost.localdomain localhost4 localhost4.localdomain4
::1         localhost localhost.localdomain localhost6 localhost6.localdomain6
211.xxx.xxx.xxx web-server

# shutdown -r now
192.168.10.79 delivery-web-server
ssh에 대한 무작위 대입 공격 방지
sshd_config의 최대 시도 횟수 및 failban 적용.
MaxAuthTries에 설정을 해도 다시 재접속 할 경우 접속이 가능하다고 합니다.
Fail2ban은 반복해서 틀릴 경우 아이피를 차단합니다.
# vim /etc/ssh/sshd_config
MaxAuthTries 3

# yum install epel-release
# yum install fail2ban
# yum install fail2ban-systemd

# cp /etc/fail2ban/jail.conf /etc/fail2ban/jail.local

# vim /etc/fail2ban/jail.local
ignoreip = 127.0.0.1/8 xxx.xxx.xxx.0/24

bantime  = 60m

findtime  = 60m

maxretry = 3

[sshd]
enabled = true
port    = ssh
logpath = %(sshd_log)s
backend = %(sshd_backend)s

# systemctl enable fail2ban
# systemctl restart fail2ban
# systemctl status fail2ban
# sudo fail2ban-client status sshd
Status for the jail: sshd
|- Filter
|  |- Currently failed: 9
|  |- Total failed:     226
|  `- Journal matches:  _SYSTEMD_UNIT=sshd.service + _COMM=sshd
`- Actions
   |- Currently banned: 14
   |- Total banned:     14
   `- Banned IP list:   188.166.122.206 61.177.172.160 112.85.42.73 112.85.42.128 92.255.85.237 112.85.42.119 218.92.0.221 222.186.30.112 122.194.229.59 122.194.229.40 218.92.0.211 165.232.112.163 212.192.241.124 112.85.42.28
Timezone
# date
2022. 02. 14. (월) 04:57:13 EST
# timedatectl
 Local time: 월 2022-02-14 04:57:41 EST
           Universal time: 월 2022-02-14 09:57:41 UTC
                 RTC time: 월 2022-02-14 09:57:41
                Time zone: America/New_York (EST, -0500)
System clock synchronized: yes
              NTP service: active
          RTC in local TZ: no
# timedatectl list-timezones | grep -i seoul
Asia/Seoul
# timedatectl set-timezone Asia/Seoul
# timedatectl
Node.js 설치
NodeJS 공식 홈페이지:{target=”blank”}를 보면 현재 최신 버전이 18.1.0버전이고 NVM 패키지를 이용하여 최신 버전을 설치 하도록 하겠습니다.
# curl -o- https://raw.githubusercontent.com/nvm-sh/nvm/v0.39.1/install.sh | bash
# source ~/.bashrc
# nvm --version
0.39.1
# nvm list-remote
...
 v17.9.0
 v18.0.0
 v18.1.0

# nvm install v18.1.0
Downloading and installing node v18.1.0...
Downloading https://nodejs.org/dist/v18.1.0/node-v18.1.0-linux-x64.tar.xz...
##################################################################### 100.0%
Computing checksum with sha256sum
Checksums matched!
Now using node v18.1.0 (npm v8.8.0)

# node --version
v18.1.0
# npm --version
8.8.0
추가로 여러 node.js 버전을 이용하려면 아래 처럼 하면 됩니다. 다른 버전을 사용하려면 nvm install 버전 한 다음 nvm use 버전 을 하면 됩니다.
# nvm install --lts
# nvm current
v16.15.0
# nvm use v18.1.0
Now using node v18.1.0 (npm v8.8.0)
# nvm current
v18.1.0
NginX 설치
# dnf upgrade --refresh -y
# dnf install -y nginx
# systemctl start nginx
# systemctl enable nginx

# firewall-cmd --add-service={http,https} --permanent
success
# firewall-cmd --reload
# firewall-cmd --list-all
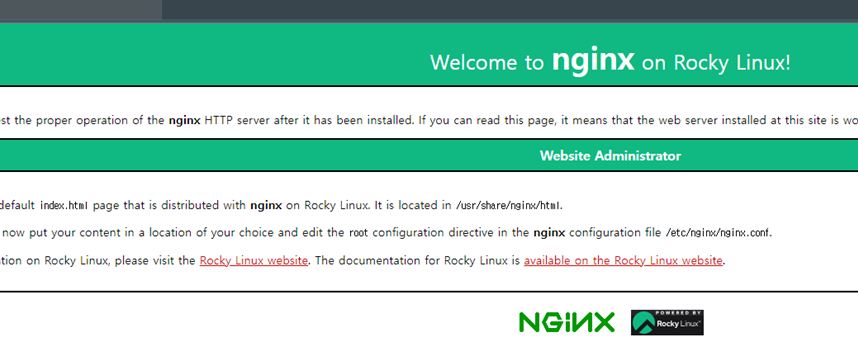
브라우저에서 nginx 접근이 가능한지 테스트 해보면 정상적으로 나옵니다.
Nginx Vue 프로젝트 설정
vue 배포 경로를 생성합니다.
# mkdir -p /var/www/html
내 컴퓨터 vue 프로젝트 Terminal에서 npm run build을 실행하면 dist 디렉토리가 생성됩니다.
*build 전 참고
.env                # 모든 모드에 적용되는 환경 변수 파일
.env.local          # 모든 모드에 적용되나 개인만 사용하는 파일(git에 올라가지 않음)
.env.[mode]         # 특정 모드에 해당하는 환경 변수 파일
.env.[mode].local   # 특정 모드에 해당하지만 개인이 사용하는 파일(git에 올라가지 않음)
.env.production
NODE_ENV = "production"

BASE_URL: "/"

VUE_APP_API_URL = "https://api....."
VUE_APP_API_TIMEOUT = 20000
배포 모드인 npm run build 명령어를 입력하게 되면 .env.production 파일의 내용이 가장 높은 우선순위를 갖게 됩니다.
# npm run build
...
DONE  Build complete. The dist directory is ready to be deployed.
INFO  Check out deployment instructions at https://cli.vuejs.org/guide/deployment.html
SFTP로 dist를 서버로 전송합니다.
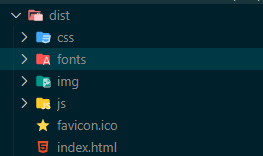
# ls /var/www/vue/dist
css  favicon.ico  fonts  img  index.html  js
# chcon -R -t httpd_sys_content_t /var/www/vue/dist
# ls -lZd  /var/www/vue/dist/
drwxr-xr-x. 6 root root unconfined_u:object_r:httpd_sys_content_t:s0 110  5월 13 17:55 /var/www/vue/dist/
Nginx에 해당 디렉토리를 설정합니다.
server {
        listen       80 default_server;
        listen       [::]:80 default_server;
        server_name  localhost;
        root         /var/www/vue/dist

        charset utf-8;
        root /var/www/vue/dist;
        index index.html;

        location @rewrites {
            rewrite ^(.+)$ /index.html last;
        }

        location / {
            try_files $uri $uri/ /index.html;
        }
}
systemctl restart nginx
백엔드 api server upstream 502 오류
connect() to 211.240.6.5:9090 failed (13: Permission denied) while connecting to upstream
SELinux의 httpd 관련 허용 설정
# setsebool httpd_can_network_connect on
# sudo setsebool -P httpd_can_network_connect 1   (영구 적용)
# getsebool -a | grep http
httpd_anon_write --> off
httpd_builtin_scripting --> on
httpd_can_check_spam --> off
httpd_can_connect_ftp --> off
httpd_can_connect_ldap --> off
httpd_can_connect_mythtv --> off
httpd_can_connect_zabbix --> off
httpd_can_network_connect --> on
Nginx에 백엔드 api 설정
upstream api-backend {
    server xxx.xxx.xxx.xxx:8080;
}

server {
    listen 443 ssl http2;
    listen [::]:443 ssl http2;
    server_name api.backend.co.kr;

    ssl_certificate ...

    access_log /var/log/nginx/api-backend.access.log main;
    error_log /var/log/nginx/api-backend.error.log;


    location / {
        proxy_set_header    Host $http_host;
        proxy_set_header    X-Real-IP $remote_addr;
        proxy_set_header    X-Forwarded-For $proxy_add_x_forwarded_for;
        proxy_set_header    X-Forwarded-Prefix $http_x_forwarded_prefix;
        proxy_set_header    X-Forwarded-Proto https;
        proxy_set_header    X-NginX-Proxy true;
        proxy_redirect off;
        charset utf-8;
        proxy_pass http://api-backend;
    }
}
추가 내용
브라우저 캐싱 관련
npm run build 를 실행하면 생성되는 js, css 파일과 index.html 를 서버 dist 디렉토리에 배포하면 웹서버를 접근하는 사용자는 브라우저 캐싱 리소스가 아닌변경된 js, css 파일을 신규로 다운로드하게 되고 변경된 화면을 로드하게 됩니다.
Cookie SameSite
-
Strict : Cookie를 전달 할 때 현재 페이지 도메인과 요청받는 도메인이 같아야만 쿠키가 전송.
-
Lax : Strict에서
<a href>,<link href>, GET Method 요청을 제외하고 Strict랑 같음. (크롬 80버전부터는 SameSite Default값이 Lax) -
None : 도메인 검증 안함 (대신 secure 옵션이 필수로 붙어야함)
-
SameSite를 사용하기 위해서는 프론트와 백엔드의 도메인을 맞추거나 Nginx 프록시를 사용해서 요청. SameSite에서 도메인을 판단하는 기준
-
Secure는 HTTPS 프로토콜 상에서 암호화된 요청일 경우에만 전송.
-
HttpOnly는 XSS 공격을 방지하기 위해 JavaScript의 Document.cookie API에 접근할 수 없음.
댓글남기기