Visual Studio Code Extensions
Visual Studio Code에서 유용하게 사용할 수 있는 Extensions(3rd party app)를 설치 합니다.
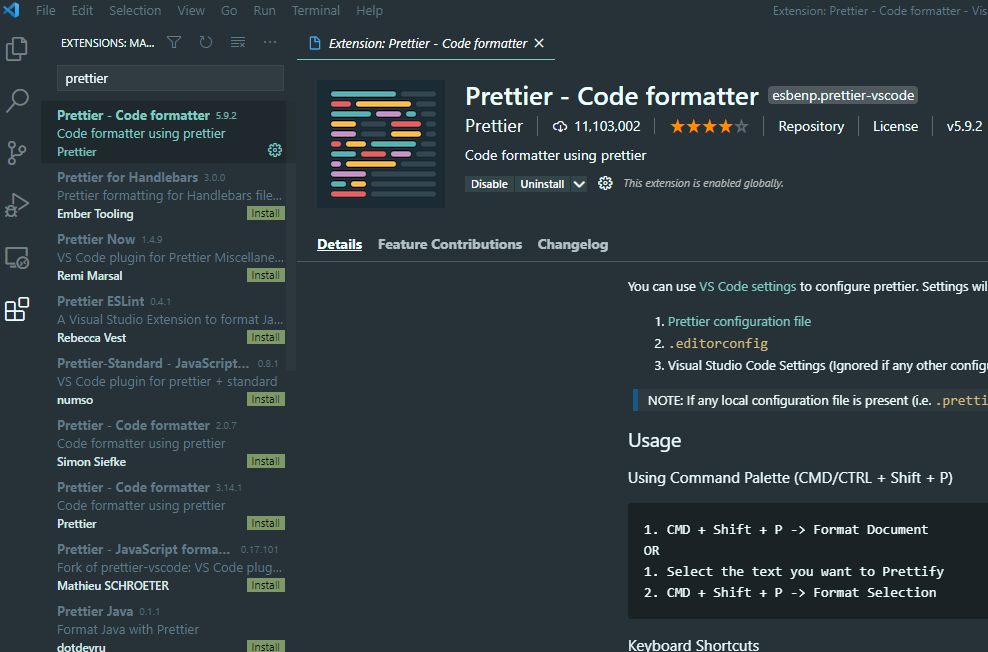
1. Prettier
Prettier은 javascript, html 등의 코드를 사용자가 정한 작성 규칙에 맞게 만들어줍니다. 팀 내 코드 작성 규칙이 있다면 prettier로 일관된 작성 규칙을 따라 개발을 할 수 있습니다.
-
install
좌측 메뉴의 extensions 검색창에서 prettier을 검색하여 install합니다.
-
config
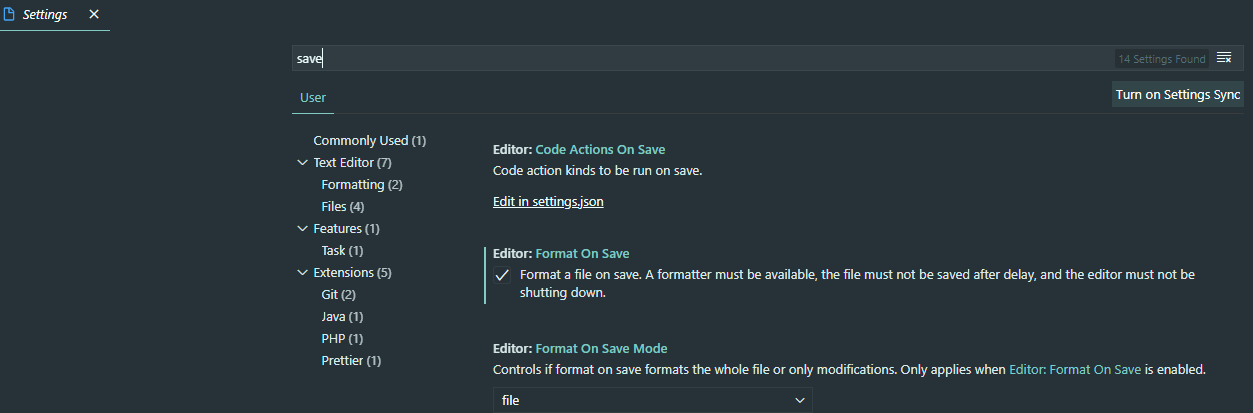
Settings ( ctrl+, ) 를 열고 save 을 검색하여 Editor:Format On Save를 체크 합니다.
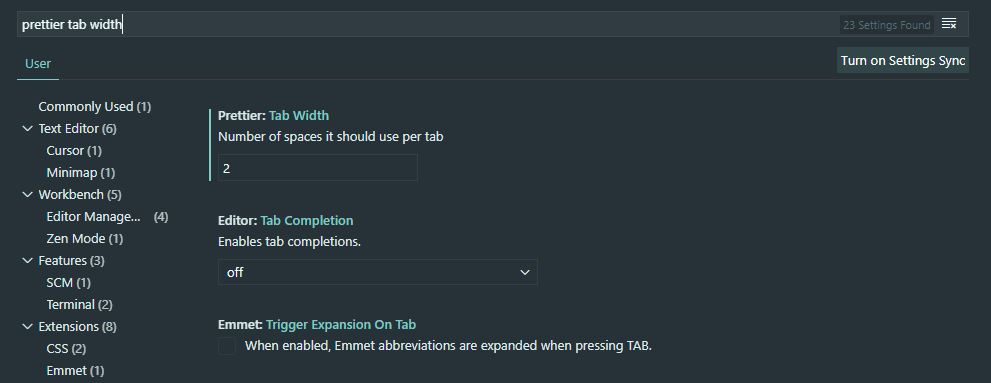
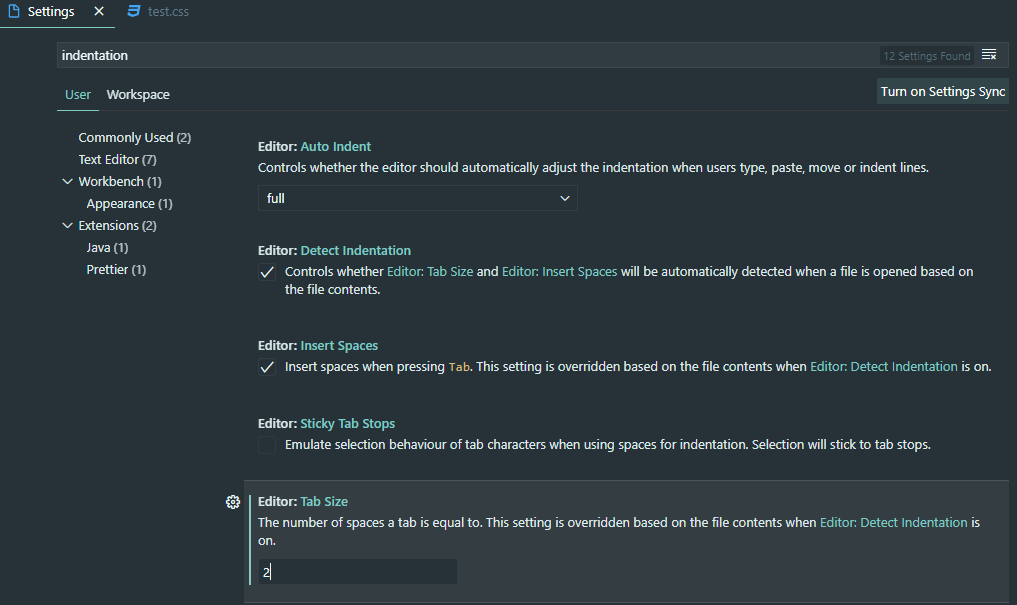
prettier tab wdith는 tab키를 눌렀을때 몇칸을 이동시킬 지 설정하는 값이고, 기본값은 2로 되어 있습니다.
보통 2로 설정하며 4로 설정하면 javascript 나 html는 코드가 길어 질 수록 가독성이 떨어집니다.
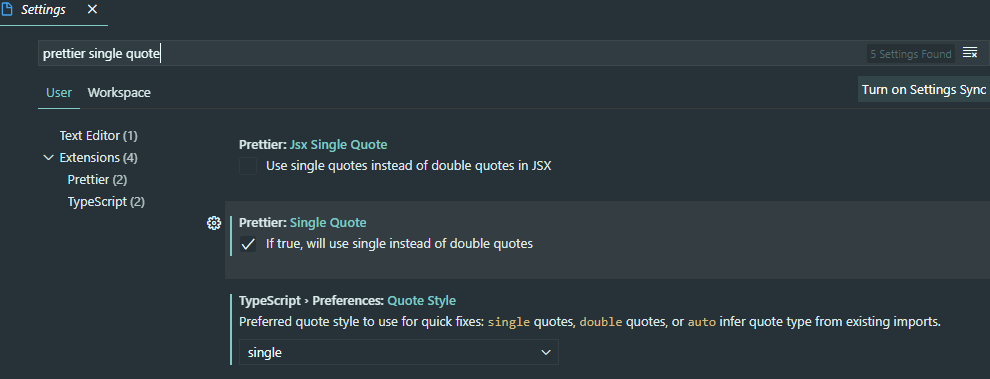
prettier quote는 javascript의 ‘ 또는 “ 등으로 포맷을 맞추는 설정 값입니다.
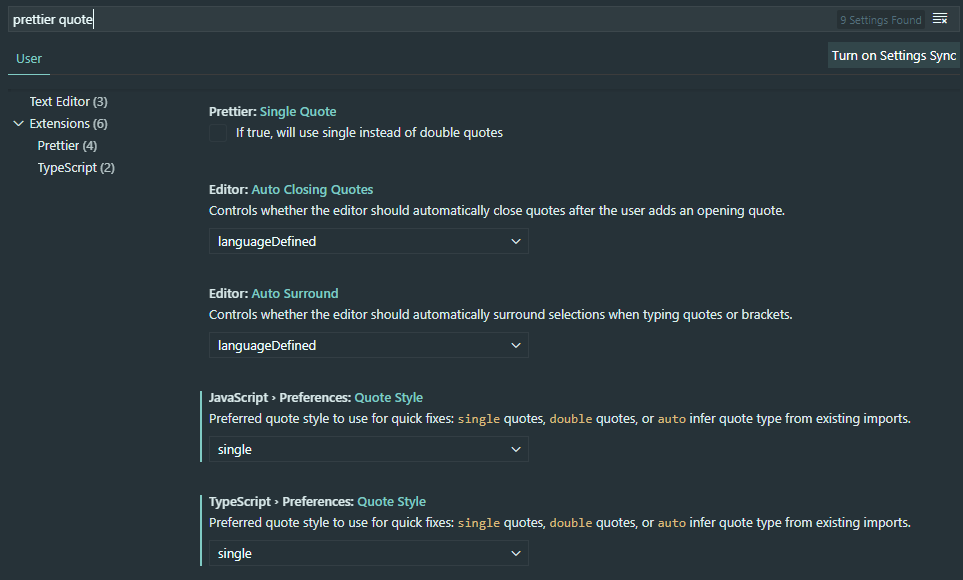
prettier Sile Quote 체크 설정.
이렇게 Settings에서 검색하여 설정하는 방법도 있지만 Settings.json에서 한번에 설정할 수도 있습니다.
{ "workbench.colorTheme": "Material Theme", "workbench.iconTheme": "material-icon-theme", "terminal.integrated.fontFamily": "MesloLGS NF", "terminal.integrated.shell.windows": "C:\\Windows\\System32\\wsl.exe", "files.autoGuessEncoding": true, "editor.suggestSelection": "first", "vsintellicode.modify.editor.suggestSelection": "automaticallyOverrodeDefaultValue", "editor.formatOnSave": true, "typescript.preferences.quoteStyle": "single", "javascript.preferences.quoteStyle": "single", "[html]": { "editor.defaultFormatter": "esbenp.prettier-vscode" }, "[javascript]": { "editor.defaultFormatter": "esbenp.prettier-vscode" }, "prettier.tabWidth": 2, "prettier.singleQuote": true, "eslint.workingDirectories": [ { "mode": "auto" } ] } -
Usage
Mac CMD + Shift + P
Windows Ctrl + Shift + P
또는
editor.formatOnSave가 true로 설정되어 있기 때문에 save(Ctrl+S)만 해도 자동으로 적용 됩니다.
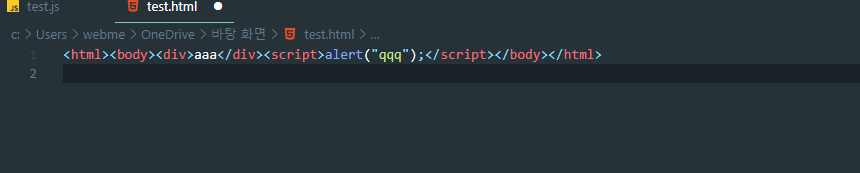
HTML before
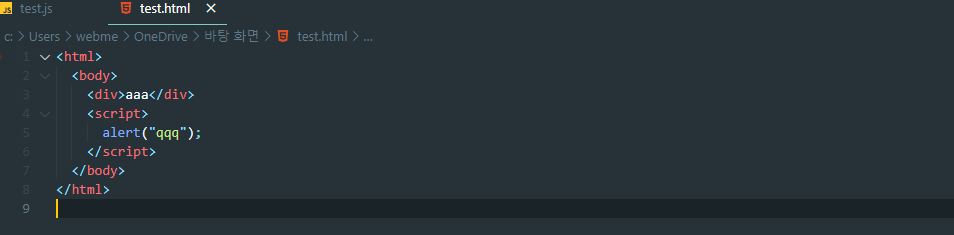
HTML After
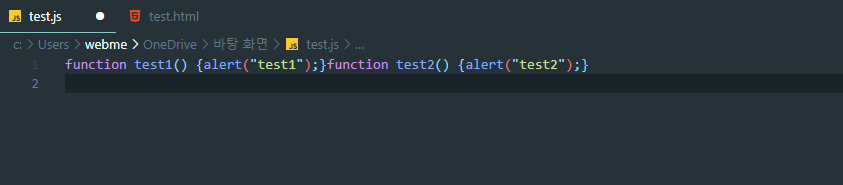
Javascript(.js) Before
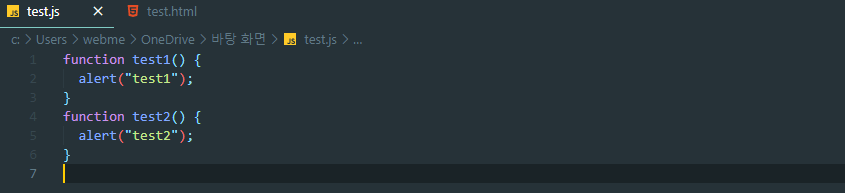
Javascript(.js) After
-
Visual Studio Code 내의 Tab Size 조절
2. ESLint
Javascript의 잠재적인 오류를 찾아거나 수정해주는 기능을 하는 Extensions입니다.
-
install
ESLint를 사용하기 위해서는 npm과 node.js가 필요합니다.
저는 Windows에서 WSL2로 Ubuntu를 사용 중이며 기본적인 설치가 안되어 있는 상황이기 때문에 기본적인 설치과정부터 시작하므로 이미 설치되어 있으신 분들은 skip하셔도 됩니다.
$sudo apt-get install curl
[sudo] password for donghyeok-dev:
Reading package lists... Done
Building dependency tree
Reading state information... Done
curl is already the newest version (7.68.0-1ubuntu2.4).
curl set to manually installed.

$curl -o- https://raw.githubusercontent.com/nvm-sh/nvm/v0.35.3/install.sh | bash
  % Total    % Received % Xferd  Average Speed   Time    Time     Time  Current
                                 Dload  Upload   Total   Spent    Left  Speed
100 13527  100 13527    0     0  37997      0 --:--:-- --:--:-- --:--:-- 37997
=> Downloading nvm from git to '/home/donghyeok-dev/.nvm'
=> Cloning into '/home/donghyeok-dev/.nvm'...
remote: Enumerating objects: 290, done.
remote: Counting objects: 100% (290/290), done.
remote: Compressing objects: 100% (257/257), done.
remote: Total 290 (delta 34), reused 111 (delta 20), pack-reused 0
Receiving objects: 100% (290/290), 163.37 KiB | 6.28 MiB/s, done.
Resolving deltas: 100% (34/34), done.
=> Compressing and cleaning up git repository

=> Appending nvm source string to /home/donghyeok-dev/.bashrc
=> Appending bash_completion source string to /home/donghyeok-dev/.bashrc
=> Close and reopen your terminal to start using nvm or run the following to use it now:

export NVM_DIR="$HOME/.nvm"
[ -s "$NVM_DIR/nvm.sh" ] && \. "$NVM_DIR/nvm.sh"  # This loads nvm
[ -s "$NVM_DIR/bash_completion" ] && \. "$NVM_DIR/bash_completion"  # This loads nvm bash_completion

//bash에 nvm을 설정하였는데, zsh에도 동일하게 설정합니다.
$code ~/.bashrc ~/.zshrc

.bashrc 맨 아래에 이 부분을 복사하여 .zshrc 파일 마지막 부분에 붙여넣고 저장합니다.
export NVM_DIR="$HOME/.nvm"
[ -s "$NVM_DIR/nvm.sh" ] && \. "$NVM_DIR/nvm.sh"  # This loads nvm
[ -s "$NVM_DIR/bash_completion" ] && \. "$NVM_DIR/bash_completion"  # This loads nvm bash_completion

$source ~/.zshrc
$nvm --version
0.35.3

$nvm install --lts
Installing latest LTS version.
Downloading and installing node v14.16.0...
Downloading https://nodejs.org/dist/v14.16.0/node-v14.16.0-linux-x64.tar.xz...
###################################################################################################################################################################################### 100.0%Computing checksum with sha256sum
Checksums matched!
Now using node v14.16.0 (npm v6.14.11)
Creating default alias: default -> lts/* (-> v14.16.0)

$nvm ls
->     v14.16.0
default -> lts/* (-> v14.16.0)
node -> stable (-> v14.16.0) (default)
stable -> 14.16 (-> v14.16.0) (default)
iojs -> N/A (default)
unstable -> N/A (default)
lts/* -> lts/fermium (-> v14.16.0)
lts/argon -> v4.9.1 (-> N/A)
lts/boron -> v6.17.1 (-> N/A)
lts/carbon -> v8.17.0 (-> N/A)
lts/dubnium -> v10.24.0 (-> N/A)
lts/erbium -> v12.21.0 (-> N/A)
lts/fermium -> v14.16.0

$node --version
v14.16.0
workspace로 경로 이동후
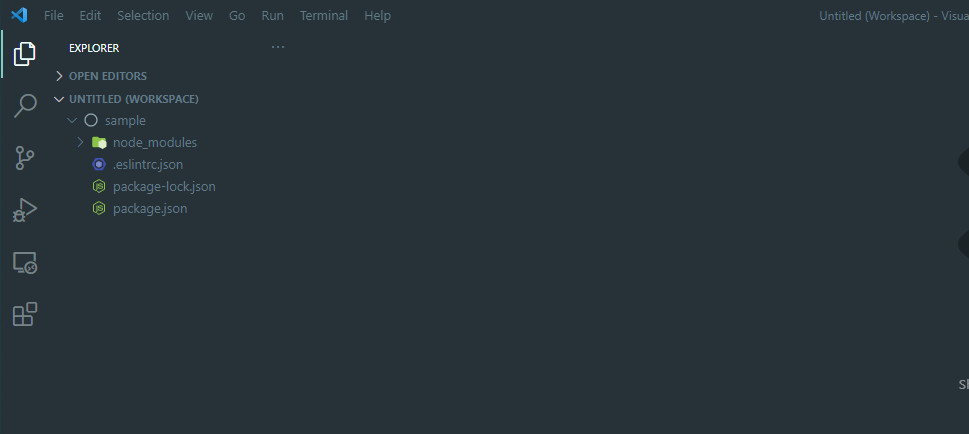
npm init -y명령어를 실행합니다.$npm init -y Wrote to /mnt/c/Users/webme/mygit/sample/package.json: { "name": "sample", "version": "1.0.0", "description": "", "main": "index.js", "scripts": { "test": "echo \"Error: no test specified\" && exit 1" }, "keywords": [], "author": "", "license": "ISC" }npm install --save-dev eslint명령을 실행합니다.$npm install --save-dev eslint npm notice created a lockfile as package-lock.json. You should commit this file. npm WARN sample@1.0.0 No description npm WARN sample@1.0.0 No repository field. + eslint@7.21.0 added 113 packages from 65 contributors and audited 113 packages in 16.637s 13 packages are looking for funding run `npm fund` for details found 0 vulnerabilitieseslint --init명령을 실행합니다.$eslint --init ✔ How would you like to use ESLint? · style ✔ What type of modules does your project use? · esm ✔ Which framework does your project use? · none ✔ Does your project use TypeScript? · Yes ✔ Where does your code run? · browser ✔ How would you like to define a style for your project? · guide ✔ Which style guide do you want to follow? · airbnb ✔ What format do you want your config file to be in? · JSON Checking peerDependencies of eslint-config-airbnb-base@latest The config that you've selected requires the following dependencies: @typescript-eslint/eslint-plugin@latest eslint-config-airbnb-base@latest eslint@^5.16.0 || ^6.8.0 || ^7.2.0 eslint-plugin-import@^2.22.1 @typescript-eslint/parser@latest ✔ Would you like to install them now with npm? · No / Yes Installing @typescript-eslint/eslint-plugin@latest, eslint-config-airbnb-base@latest, eslint@^5.16.0 || ^6.8.0 || ^7.2.0, eslint-plugin-import@^2.22.1, @typescript-eslint/parser@latest npm WARN eslint-config-airbnb@18.2.1 requires a peer of eslint-plugin-react@^7.21.5 but none is installed. You must install peer dependencies yourself. npm WARN eslint-config-airbnb@18.2.1 requires a peer of eslint-plugin-react-hooks@^4 || ^3 || ^2.3.0 || ^1.7.0 but none is installed. You must install peer dependencies yourself. npm WARN sample@1.0.0 No description npm WARN sample@1.0.0 No repository field. + eslint-plugin-import@2.22.1 + eslint@7.21.0 + eslint-config-airbnb-base@14.2.1 + @typescript-eslint/eslint-plugin@4.16.1 + @typescript-eslint/parser@4.16.1 removed 13 packages, updated 5 packages and audited 237 packages in 11.722s 25 packages are looking for funding run `npm fund` for details found 0 vulnerabilities Successfully created .eslintrc.json file in /mnt/c/Users/webme/mygit/sample여기까지 진행이 완료 되었다면 workspace 경로에 다음 그림과 같은 파일들이 생성되어 있습니다.
.eslintrc.json 파일에서 extends 부분 수정
{
    "env": {
        "browser": true,
        "es2021": true
    },
    "extends": [
        "eslint:recommended"
    ],
    "parser": "@typescript-eslint/parser",
    "parserOptions": {
        "ecmaVersion": 12,
        "sourceType": "module"
    },
    "plugins": [
        "@typescript-eslint"
    ],
    "rules": {
    }
}
.eslintrc.json파일은 eslint 설정 정보가 들어 있으며 자세한 내용은 https://eslint.org/docs/user-guide/configuring/에서 확인 바랍니다.
package.json 파일에서 scripts 부분 수정.
{ "name": "sample", "version": "1.0.0", "description": "", "main": "index.js", "scripts": { "lint": "eslint ." }, "keywords": [], "author": "", "license": "ISC", "devDependencies": { "@typescript-eslint/eslint-plugin": "^4.16.1", "@typescript-eslint/parser": "^4.16.1", "eslint": "^7.21.0", "eslint-config-airbnb": "^18.2.1", "eslint-config-airbnb-base": "^14.2.1", "eslint-plugin-import": "^2.22.1", "eslint-plugin-jsx-a11y": "^6.4.1" }, "dependencies": { "typescript": "^4.2.3" } } -
Usage
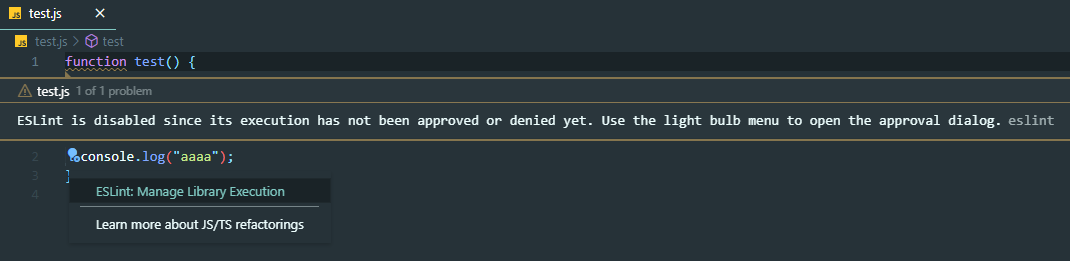
테스트를 위해 test.js 파일을 만들고 간단한 function을 만들면 function에 밑줄이 있고 마우스를 올려보면
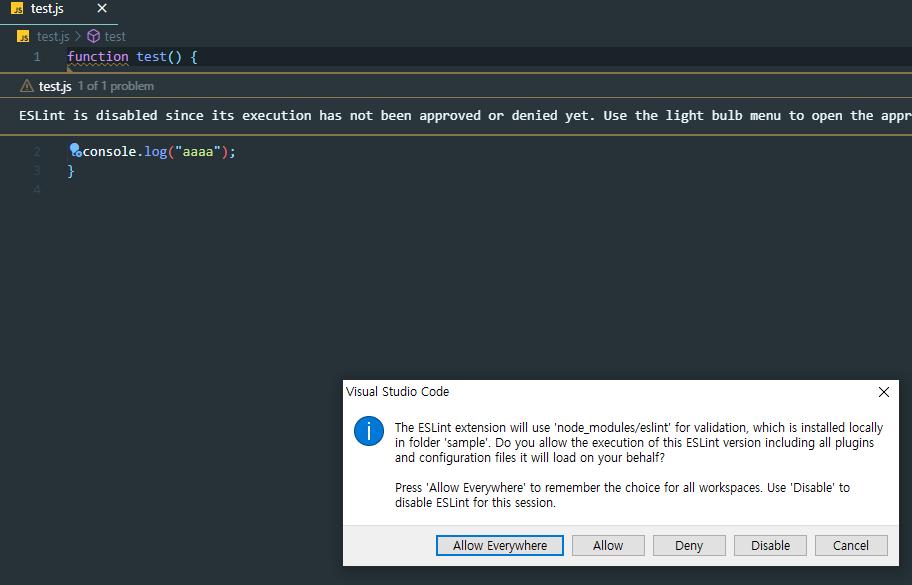
아직 ESLint 승인이 되지 않았다고 나옵니다. 그러면 그 아래 파란색 전구를 클릭하고 ESLint: Manage Library Execution을 선택합니다.
Allow Everywhere를 선택합니다.
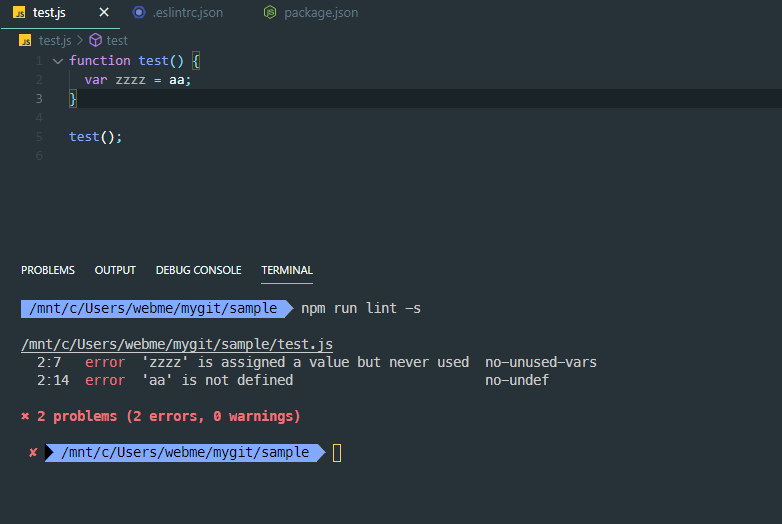
이제 오류를 발생 시키고 terminal에서 npm run lint -s를 실행 해봅니다.
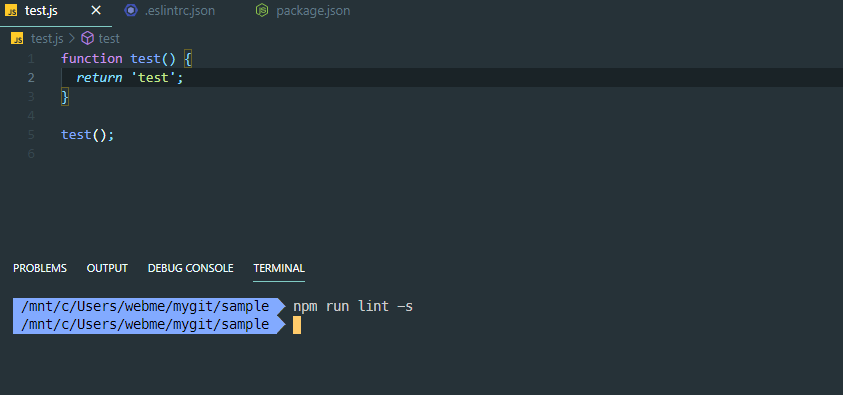
오류를 수정하고 다시 실행 한 화면 입니다.
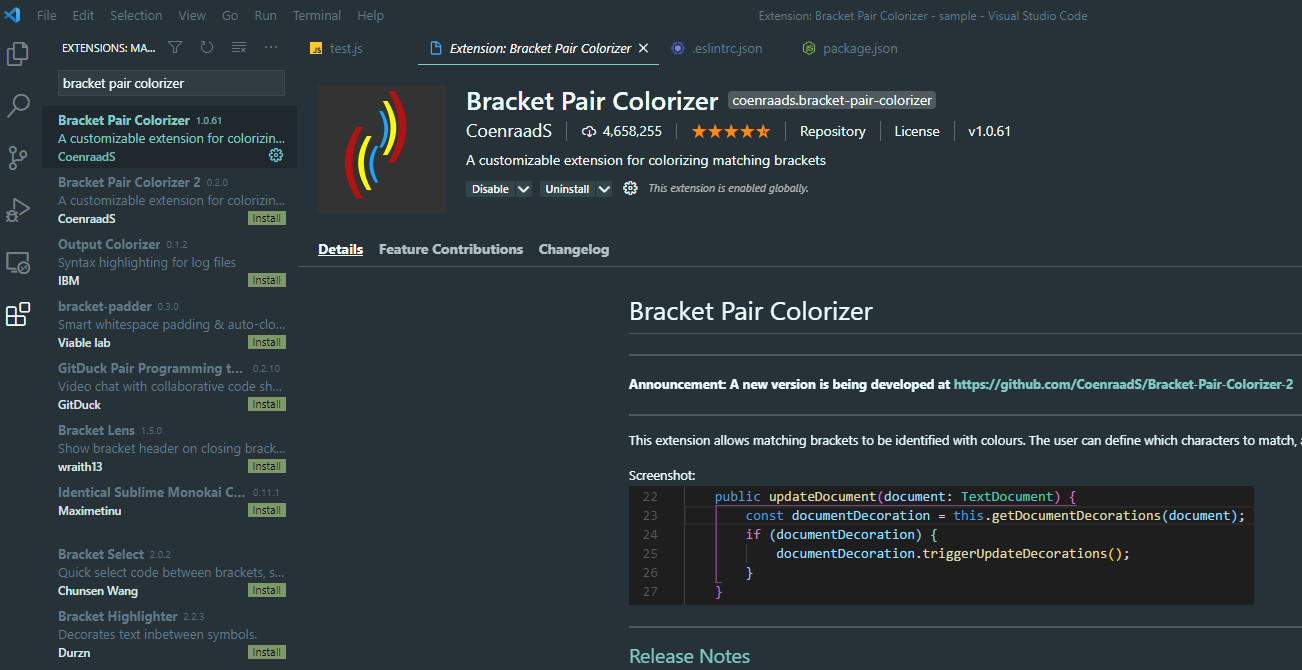
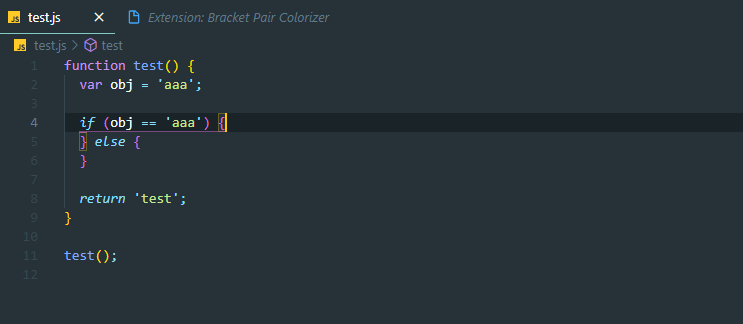
3. Blacket Pair Colorizer
괄호에 color를 넣어주어 가독성을 높여 줍니다.
-
install
-
Usage
설치 하면 자동 적용 됩니다.
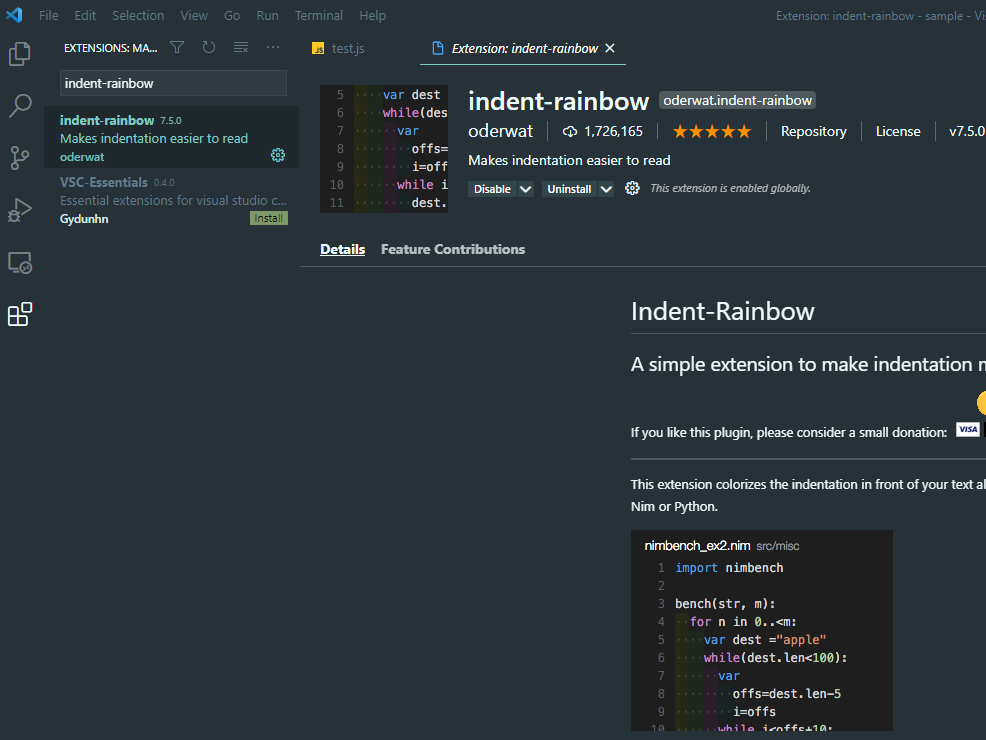
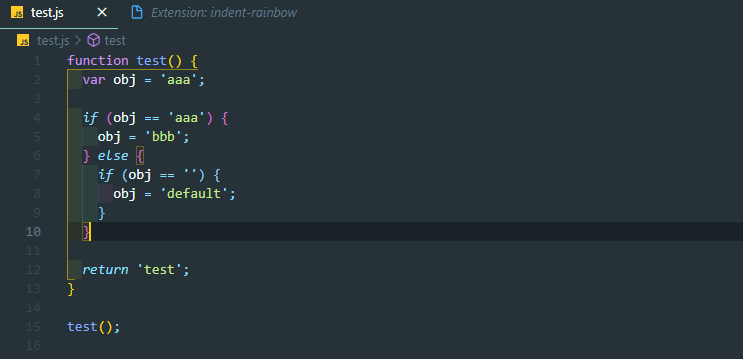
4. indent-rainbow
코드에서 들여쓰기 된 부분을 컬러로 표시 해줍니다.
-
install
-
Usage
설치 하면 자동 적용 됩니다.
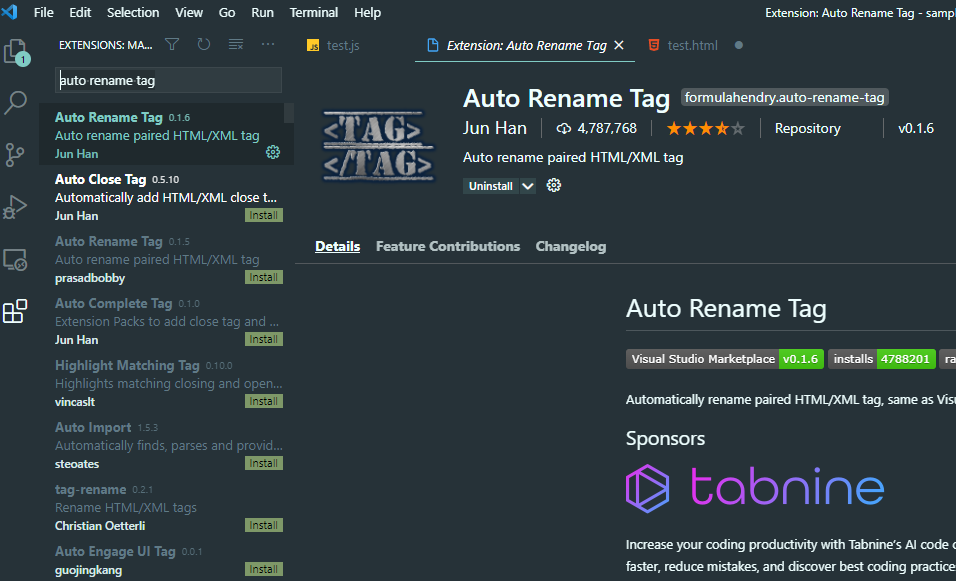
5. Auto Rename Tag
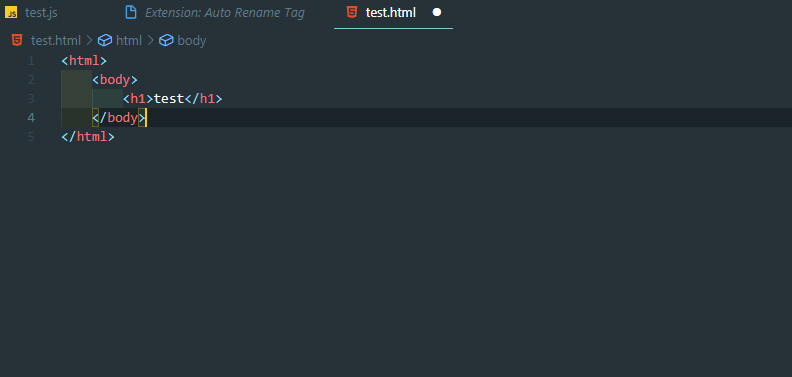
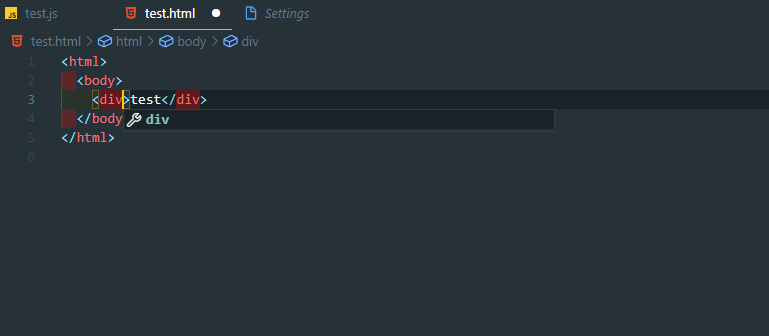
html tag를 자동으로 수정해줍니다. 예를들어 < h1 > Test < /h1> 에서 앞에 < div >만 변경 해줘도 뒤에 < /div >로 자동으로 수정됩니다.
-
install
-
Usage
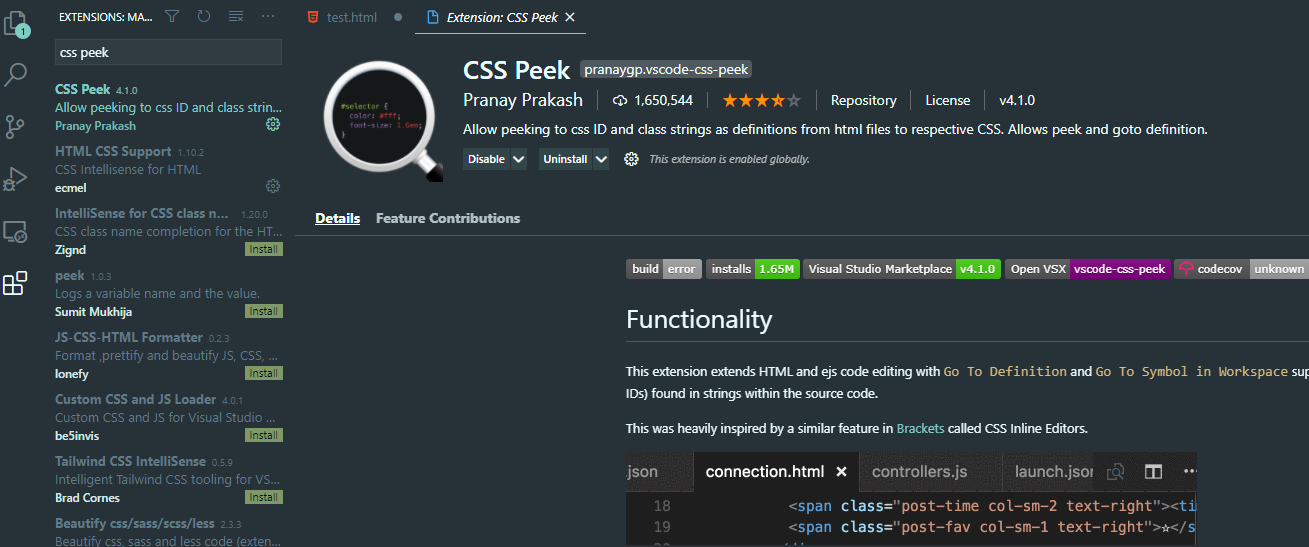
6. CSS Peek
html에서 css를 검색할 수 있게 해줍니다.
-
install
-
Usage
html 파일 내에서 class을 Ctrl+마우스 클릭
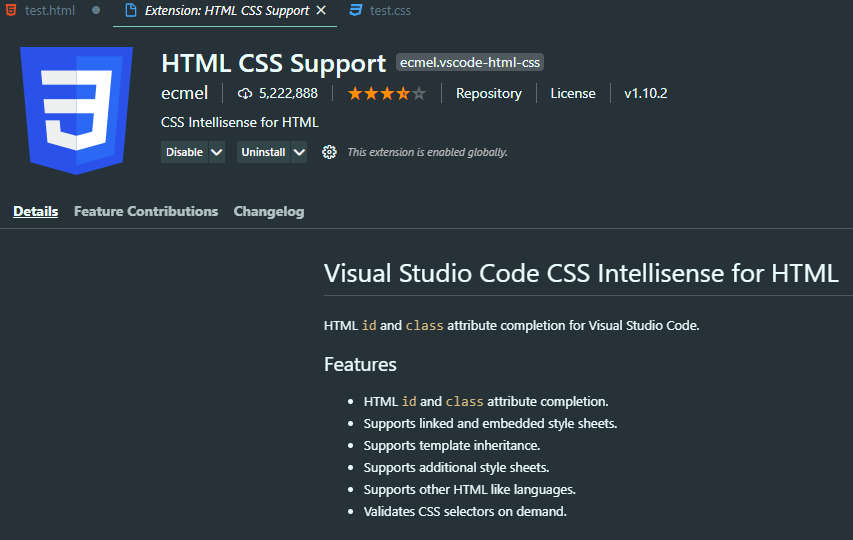
7. HTML CSS Support
html에서 css class명을 자동완성 기능을 지원해줍니다.
-
install
-
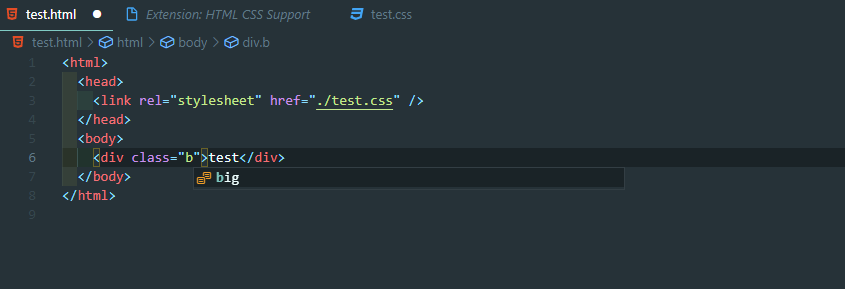
Usage
타이핑 하면 자동완성 기능이 지원됩니다.
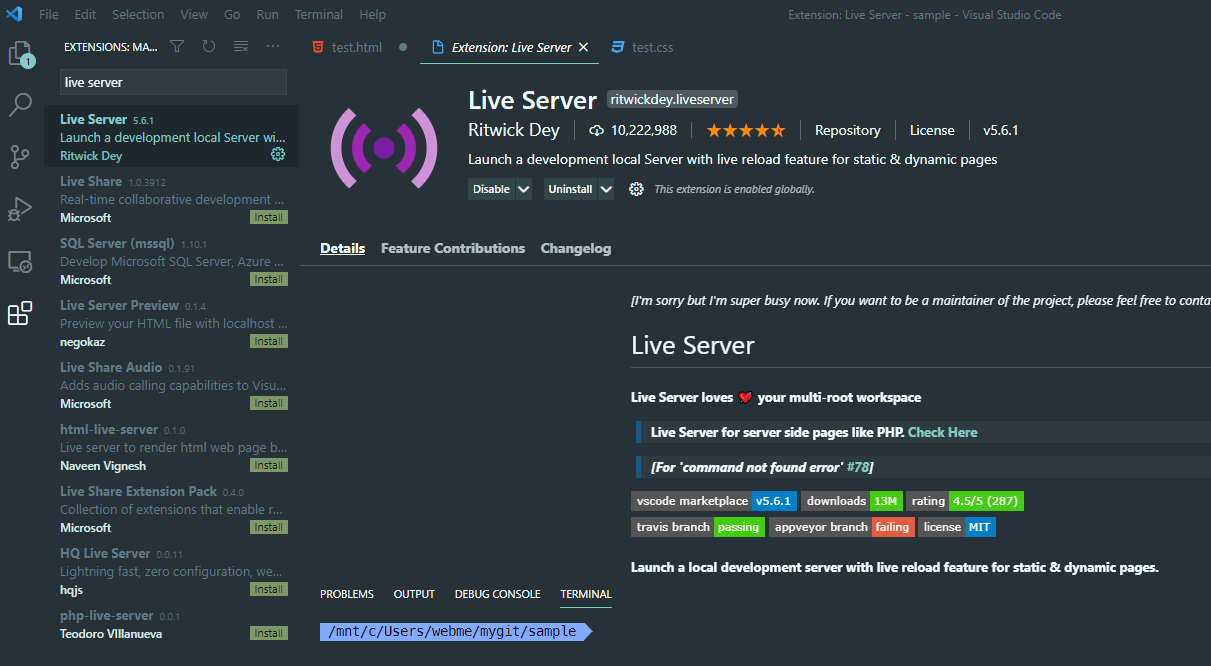
8. Live Server
html 파일을 저장함과 동시에 html 화면이 실시간으로 보여지는 기능입니다.
-
install
-
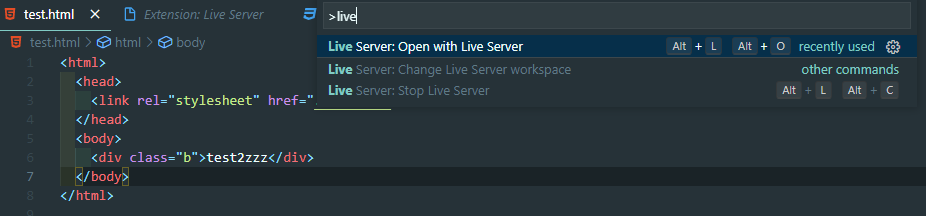
Usage
Ctrl + Shift + p 를 눌러 live라고 검색하면 Live Server: Open with Live Server가 나오는데
그걸 선택하면 새로운 브라우저 창이 하나 뜹니다. (단축키 Alt+O)
그리고 html 파일을 수정하고 저장하면 그 브라우저에 실시간으로 보여집니다.

댓글남기기