Vue3 + Vuetify + Typescript 설정
Visual Studio Code Extension설치


Vscode 설정
  "files.autoGuessEncoding": true,
  "editor.suggestSelection": "first",
  "vsintellicode.modify.editor.suggestSelection": "automaticallyOverrodeDefaultValue",
  "typescript.preferences.quoteStyle": "single",
  "javascript.preferences.quoteStyle": "single",
  "[html]": {
    "editor.defaultFormatter": "vscode.html-language-features"
  },
  "[javascript]": {
    "editor.defaultFormatter": "vscode.typescript-language-features"
  },
  "prettier.tabWidth": 2,
  "prettier.singleQuote": true,
  "eslint.workingDirectories": [{ "mode": "auto" }],
  "editor.linkedEditing": true,
  "editor.tabSize": 2,
  "prettier.printWidth": 200,
  "files.exclude": {
    "**/.classpath": true,
    "**/.project": true,
    "**/.settings": true,
    "**/.factorypath": true
  },
  "security.workspace.trust.untrustedFiles": "open",
  "liveServer.settings.CustomBrowser": "chrome",
  "terminal.integrated.defaultProfile.windows": "Command Prompt",
  "prettier.jsxSingleQuote": true,
  "editor.formatOnSave": true,
  "editor.formatOnType": true,
  "editor.defaultFormatter": "esbenp.prettier-vscode",
  "editor.codeActionsOnSave": {
    "source.fixAll.eslint": true, // eslint
    "source.fixAll.stylelint": true // Stylelint
  }
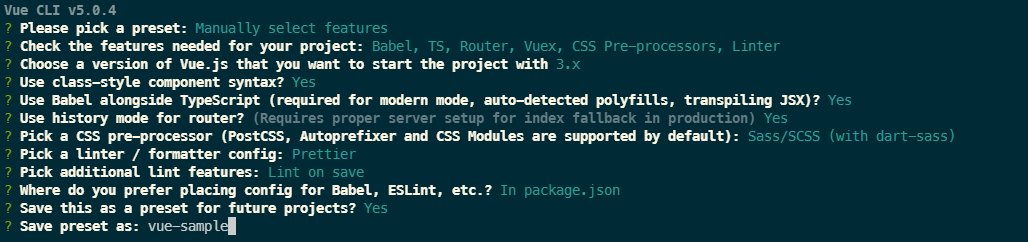
vue cli 설치
npm install -g @vue@cli
test명으로 vue 프로젝트 생성
vue create test
파일-폴더열기 에서 생성한 test 프로젝트 열기
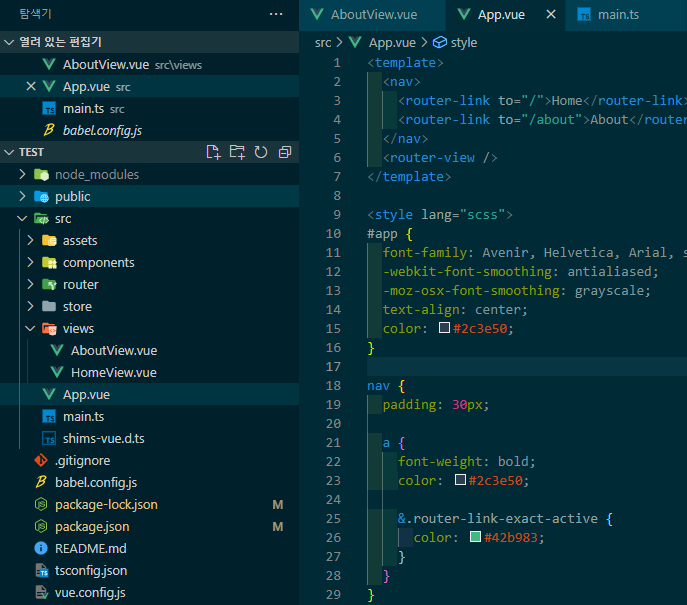
package.json eslinConfig 부분에서 ‘plugin:prettier/recommended’을 'prettier'로 변경
"eslintConfig": {
    "root": true,
    "env": {
      "node": true
    },
    "extends": [
      "plugin:vue/vue3-essential",
      "eslint:recommended",
      "@vue/typescript/recommended",
      "prettier"
    ],
    "parserOptions": {
      "ecmaVersion": 2020
    },
    "rules": {}
  },
.prettierrc파일 생성
{
  "arrowParens": "avoid",
  "bracketSpacing": false,
  "endOfLine": "auto",
  "htmlWhitespaceSensitivity": "css",
  "jsxBracketSameLine": false,
  "jsxSingleQuote": false,
  "printWidth": 200,
  "proseWrap": "preserve",
  "quoteProps": "as-needed",
  "semi": true,
  "singleQuote": true,
  "tabWidth": 2,
  "trailingComma": "all",
  "useTabs": false,
  "vueIndentScriptAndStyle": true,
  "overrides": [
    {
      "files": "*.json",
      "options": {
        "printWidth": 200
      }
    }
  ]
}
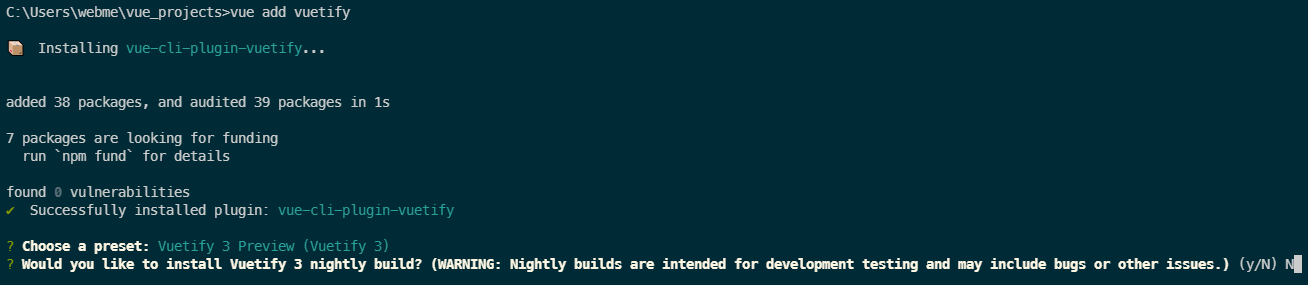
vuetifyjs 설치
bootstrap-vue를 사용해도 되지만 요즘 vuetify를 많이 사용한다고해서 설치 해봅니다.
설정전에 vue cli로 설치된 sass-loader와 vuetify sass-loader의 버전 충돌 이슈가 발생하기 때문에 이것 부터 해결 하고 설치합니다.
conflicting versions for project dependency "sass-loader":

       - ^12.0.0 injected by generator "undefined"
       - ^10.0.0 injected by generator "vue-cli-plugin-vuetify"

       Using newer version (^12.0.0), but this may cause build errors.
vue-cli-plugin-vuetify는 10.0.0을 사용하므로 vue ssas 버전을 변경 해줍니다.
터미널에서
npm install -D sass-loader@10.0.0
vuetify 설치
vue add vuetify
Vuetify 3 Preview (Vuetify 3) 선택
N 입력
Delete ‘cr’ eslint 오류가 발생한다면 CRLF -> LF로 변경합니다.

터미널에서 서버를 실행하고 브라우저에서 확인합니다.
npm run serve


Vuetify 3 Beta 문서, Material Icon를 참조하여 테마를 적용하면 됩니다.
vuex
https://levelup.gitconnected.com/complete-vuex-4-guide-states-getters-mutations-actions-modules-plugins-and-composition-api-eff469c43b4f
새로고침 방지
npm install vuex-persistedstate
vuetify 커스트마이징
https://v15.vuetifyjs.com/ko/framework/theme/
axios 설치
https://www.npmjs.com/package/vue-axios
npm i axios
axios cors 문제 spring boot 에서 설정하기
https://www.baeldung.com/spring-cors
datepicker
https://vue3datepicker.com/installation/#global
<Datepicker v-model="date" format="yyyy-MM-dd" autoApply :enableTimePicker="false" locale="ko"></Datepicker>


<script lang="ts">
  import {defineComponent, ref} from 'vue';
  import Datepicker from '@vuepic/vue-datepicker';
  import '@vuepic/vue-datepicker/dist/main.css';

  ...
setup() {
      const date = ref(new Date());

      return {
        date,
      };
    },
공통 함수 플로그인으로 등록해서 사용하기
/assets/ts/commonUtils.ts
import { App } from "vue";

export default {
  install: (app: App) => {
    const isEmpty = (value: string) => {
      return value === null || value === null || value.length < 1;
    };

    app.config.globalProperties.$isEmpty = isEmpty;
  },
};
main.ts
import { createApp } from "vue";
import App from "./App.vue";
import router from "./router";
import store from "./store";
import vuetify from "./plugins/vuetify";
import { loadFonts } from "./plugins/webfontloader";

import axios from "axios";
import VueAxios from "vue-axios";

import commonUtils from "@/assets/ts/commonUtils";

loadFonts();

const app = createApp(App);
app.use(router);
app.use(store);
app.use(vuetify);
app.use(VueAxios, axios);
app.provide("axios", app.config.globalProperties.axios);
app.use(commonUtils);

app.mount("#app");
사용하고자하는 vue파일
... methods: { searchData() { if (this.$isEmpty(this.mobileNo)) { ... } } }
this.$helloprint();를 못 찾는 오류가 발생하면 tsconfig.json에 아래 항목 추가.
{
  "compilerOptions": {
    ...
    "noImplicitThis": false,
  }
}
vue 날짜 포맷 등 라이브러리 moment.js 대신 가벼운 dayjs 사용해보기
https://github.com/iamkun/dayjs/blob/HEAD/docs/ko/README-ko.md
npm install dayjs --save
전역으로 사용하기 위해 main.ts에 추가
import dayjs from 'dayjs';

const app = createApp(App);
...
app.config.globalProperties.$dayjs = dayjs;
app.mount('#app');
사용하고자하는 vue파일에서 다음 처럼 사용가능.
<td>{{ $dayjs(item.rgstrYmd, 'YYYYMMDDHHmmss').format('YYYY-MM-DD HH:mm') }}</td>

또는

mounted() {
	const tt = this.$dayjs('20220430123050', 'YYYYMMDDHHmmss').format('YYYY-MM-DD HH:mm');
},
전역 컴포넌트 지정하기
예를들어 달력 컴포넌트를 여러 view에서 사용한다면 아래와 같은 코드가 중복적으로 발생함.
import Datepicker from "@vuepic/vue-datepicker";
import "@vuepic/vue-datepicker/dist/main.css";

export default {
  components: { Datepicker },
};
따라서 Datepicker를 전역 컴포넌트로 지정해서 사용하는 것이 좋겠다고 생각함.
main.ts
...
import Datepicker from '@vuepic/vue-datepicker';
import '@vuepic/vue-datepicker/dist/main.css';

const app = createApp(App);
app.use(router);
app.use(store);
app.use(vuetify);
app.use(VueAxios, axios);
app.provide('axios', app.config.globalProperties.axios);
app.use(commonUtils);
app.config.globalProperties.$dayjs = dayjs;
app.component('GlobalDatepicker', Datepicker);
app.mount('#app');
해당 view에서
<v-col cols="12" md="2">
			<GlobalDatepicker
                v-model="params2.receiptDay"
                format="yyyy-MM-dd"
                autoApply
                :enableTimePicker="false"
                locale="ko"
                inputClassName="dp-custom-input"
              ></GlobalDatepicker>
</v-col>
Parameter ‘response’ implicitly has an ‘any’ type, but a better type may be inferred from usage.
무시하기
tsconfig.json
"noImplicitAny": false,
loading bar 넣기
https://www.npmjs.com/package/vue-loading-overlay
npm install vue-loading-overlay@^5.0
<template>
  <v-container fluid style="height: 100vh">
      <VueLoading
      v-model:active="isLoading"
      :can-cancel="false"
      :is-full-page="false"
      :width="100"
      :height="100"
      color="#5586EB"
      background-color="#FFF"
      :opacity="0"
      loader="spinner"
    />
    </v-container>
</template>
<script lang="ts">
  import {defineComponent} from 'vue';
  import VueLoading from 'vue-loading-overlay';
  import 'vue-loading-overlay/dist/vue-loading.css';

  export default defineComponent({
    name: 'ReceiptSearchView',
    components: {VueLoading},
    data() {
      return {
        isLoading: true,
      }
    }
  ...
loading bar + vuex 예제
https://codesandbox.io/s/display-loading-state-for-vue-axios-requests-with-vuex-cml0l?file=/src/App.vue:441-500
select, textarea 등 vue3용 vuetify3에는 버그가 많은듯.. 하..
일단 primevue라는 것을 설치해본다.
https://primefaces.org/primevue/setup
npm install primevue@^3.12.5 --save
npm install primeicons --save

import {createApp} from 'vue';
import App from './App.vue';
import PrimeVue from 'primevue/config';
const app = createApp(App);

app.use(PrimeVue);
form vuelidate
https://vuelidate-next.netlify.app/#installation
validate된 element focus 주기
https://codesandbox.io/s/vuelidate-error-focus-accessibility-6hibn
async modifyData() {
        const result = await this.v$.$validate();
        if (result === false) {
          this.messageBoxAlert(
            'error',
            '필수 값을 입력해주세요.',
            this.$refs[this.v$.$errors[0].$property].$el.querySelector('input'),
          );
          // this.$refs[this.v$.$errors[0].$property].$el.querySelector('input').select();
        } else {
          this.$commonAxios.put(this.results._links.update.href, this.results).then(response => {
            this.messageBoxAlert('success', '저장 완료');
            this.receiptModifyModal = false;
          });
        }
      },
댓글남기기